Tracing Projector
Use a Tracing Projector for Creating an Outline.
It's out of the box and ready to go.
Now where do you use your tracing projector, and how?
You could just "wing it", or... you could get some ever-so-helpful tips from a nice artist...like me.
Now let's go over the...
- when
- where
- and how
When to use your tracing projector
The main reason for using a projector is to enlarge an image that is just too small for you use the grid method.
Most photos that people have in their collections will need to be enlarged.
You could try and use a scanner to do this; however I've found that the quality of the image is sometimes not that great.
Additionally, using a projector will eliminate the need to draw a graph as you will already have an outline of the image completed.
This is going to save you a lot of time, especially if your needing to crank-out finished works for paying customers.
I actually prefer the projector for this very reason. I still have to create a graph if the image is too large for the machine to project the entire image. Besides, making a line-graph isn't my favorite activity.
Another great use for an art projector is when you want to combine images from separate photos onto one drawing.
I had one customer who wanted her two daughters painted onto one portrait. I used my art projector to draw the images onto one piece of paper.
Where to use your art projector
Unfortunately you can't set-up your tracing projector just anywhere.
It's a little more complicated than that.
In order for the projector to enlarge an image, you'll need some space between the machine and your paper.
How much space will be determined by how big you need the finished product to be. The average is about 5 feet, give or take a foot.
Because you'll need to attach your paper to something steady, find a room with a smooth wall or door that you can tape the paper onto.
If the wall isn't smooth, you might try attaching a thick piece of poster board to the wall and then taping your paper onto that. Be sure the tape is low-tack such as drafting tape.
Next you'll need a dark room.
You have a couple of options:
Waiting until dark is the easiest method. Just wait until the sun drops, then turn out the lights.
If you choose to use the projector during daylight hours, you'll need some creativity.
Try and find a windowless area with a minimum amount of light coming in. I have a space in my basement that I can use if needed.
If all else fails, find a room with one window that can be covered completely with something dark. You may have to shove a towel along the bottom of the door to keep out light coming in from the next room.
You might consider a shed or garage as long as the light can be shut out without too much extra effort.
Of course if you have the eyes of Superman you can try and use the projector in a bright room...Good luck with that.
One final thing about location.
Try and find a location that is on the lowest floor in the house, such as the basement.
The reason for this is that sometimes while your using your art projector you might need to walk around the room. If the floor isn't solid enough, the movement may shift the projector just enough to misaligned the projected image from the unfinished outline.
If this happens to you, I give you permission to use a few colorful words.
How to use your tracing projector

Using a Tracing projector is so easy a monkey could do it, (wouldn't that be interesting to watch).
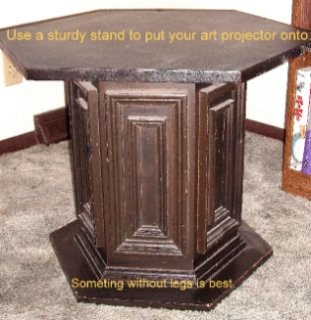
You'll need a very firm table or stand to set your projector onto. Something with a lot of surface area touching the floor as things with thin legs tend to wriggle around.
End tables and coffee tables are pretty good choices.
Assuming that you have the projector in your designated room, it's just a matter of ...
- taping your drawing paper to a smooth surface
- placing the photo on top of, or underneath (depending on the type you have) the tracing projector.
- Turning on the machine
- placing the projected image onto the paper
- adjusting the enlargement (done by adjusting the distance between the projector and the paper)
- focusing (done by slowly turning the lens)
After you're satisfied with the adjustments you may now begin creating an outline.
Some final thoughts...
While creating an outline don't think that you have to draw every... single... detail.
Just outline what you will need to finish the drawing, including where the shadows start and stop.
If you take the paper down and realize that you forgot a detail, you'll probably need to start over, unless it's something that can easily be fixed.
I did it once...after about 2 minutes and some new naughty words...I gave up.
In conclusion...
You don't need to rush out to buy a tracing projector. You should practice drawing larger pieces anyway.
It's better to be able to draw with just the basic tools.
If however you decide that you need an art projector as a supplemental tool, then do your research and buy the one that will work the best for you.
Subscribe to my Newsletter